| |
|
|
| |
|
|
| NT-206 |
|
:::
ANTIVIBRATION RACK |
|
|
|

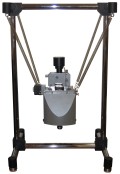
Upper: SPM NT-206 suspended in the table-top antivibration
rack. Right: Floor-standing rack. |
 |
- Passive vibration isolation for measurements with AFM NT-206 in the scan ranges
below 1 um.
- Desk-top or floor standing design options.
- A highly effective alternative for active antivibration platforms.
- Fully dismountable.
- Overall size (w-d-h): Desk-top version - 420x420x700 mm, weight <3.5 kg;
floor standing version - 480x420x1500 mm, weight <6,5 kg.
|
| |
|
|
| NT-206 |
|
:::
REPLACEABLE SCANERS |
|
|

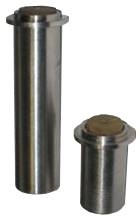
Replaceable scanner.
Sizes: Diam.24x70 mm, Diam.24x42 mm (without wires), weight <70 g |
Employment of a scaner having optimal XYZ motion range in given application
provides the best resolution in the obtained SPM image and minimizes noise.
Available are scanners for the ranges:
- 5x5x2 um
- 10x10x3 um
- 20x20x3.5 um
- 40x40x3.5 um
- 50x50x3.5 um
|
| |
|
|
| NT-206 |
|
:::
BLOCK INSERTION |
|
|

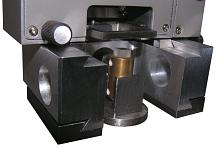
Extending block insertion allowing measurement of samples
with thicknes (height) up to 35 mm |

Extending block insertion mounted between scanning platform and measuring head
to provide additional space for thick samples.
It allows to measure samples of height (thickness) up to 35 mm. |
| |
|
|
| NT-206 |
|
:::
THERMOCELL |
|
|
| |
|

|
 |
| Thermocell
unit |
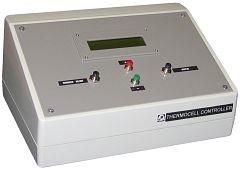
Stand-alone
controller for the thermocell heating |
- Intended for controllable heating of samples.
- Easy installation on the NT-206 sample platform.
- Maximum heating temperature: 150 °C
- Embedded thermosensor.
- Possibility of thermostating or heating program setting.
- Stand-alone controller unit supplied. Features two-line symbol LCD showing
the operation mode, current and set values.
- A possibility of application in other types of microscopes for temperature-dependent
measurements and studies.
- Supply voltage: 220 V; Control voltage 15 V, max current: 0.2 A.
- Overall dimensions: Thermocell - diam.28x10 mm (without wires), weight 8 g;
Controller - 220x160x102 mm (w-d-h), weight 1.1 kg.
 |
 |
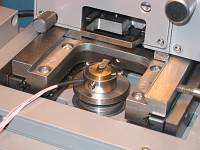
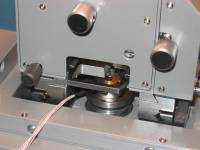
| Installation
of the thermocell on sample platform of SPM NT-206 |
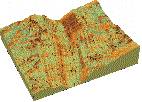
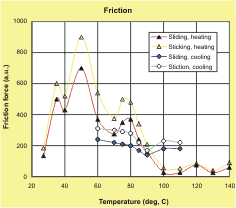
Experiment
with use of thermocell |
|
| |
|
|
| NT-206 |
|
:::
REPLACEABLE REGULAR PROBE HOLDER |
|
|

Replaceable regular probe holder. Overall dimensions (w-d-h): 34x38x9 mm,
weight <30 g |
Additional regular probe holder increases convenience at the instrument preparation
for measurement. Provides operation under static and dynamic modes. Designed for
mounting AFM probe chips with dimensions 3.4x1.6x0.4 mm.
Checked for operation with probes by Mikromasch,
NT-MDT, BudgetSensor,
Nanosensors, DI.
|
| |
|
|
| NT-206 |
|
:::
REPLACEABLE HOLDER FOR CONDUCTING PROBES |
| |
|

Replaceable holder for conducting probes. Overall dimensions
(w-d-h): 34x38x9 mm, weight <30 g |
Intended for measurements in electrical modes using conducting probes. Provides
electrical insulation for the probe. Additionally contains circuit for the voltage
application to the probe.
Should be installed in the measurement head instead of regular holder. Provides
also operation under static and dynamic modes. Designed for mounting AFM probe
chips with sizes 3.4x1.6x0.4 mm.
|
| |
|
|
| NT-206 |
|
:::
REPLACEABLE NANOINDENTOR UNIT |
|
|

Replaceable nanoindentor unit. Overall dimensions (w-d-h):
34x38x10 mm, weight <30 g |
Intended for realization of such functions like nanoindentation, nanoscratching,
nanowear of hard materials

SEM micrograph of the superhard tip mounted on the cantilever free end |
providing plastic / abrasive deformation of a sample with nanometer depth of the
probe penetration (minimum depth 0.5 nm). Cantilever with mounted tip of superhard
material is installed in the holder and then calibrated.
Should be installed in the measurement head instead of regular holder. Micromovements
and loading of a sample are performed by regular scaner of SPM NT-206.
 |
|
 |
| Nanoindentor
imprint |
|
Nanoscratching
by nanoindentor |
|
| |
|
|
| NT-206 |
|
:::REPLACEABLE
MICROTRIBOMETER-ADHESIOMETER UNIT |
|
|

Replaceable microtribometer-adhesiometer unit. Overall dimensions
(w-d-h): 34x38x10 mm, weight <30 g |
Intended for realization of microtribometry and adhesiometry functions with
help of dall microindentor mounted on the cantilever free end.
Should be installed in the measurement head instead of regular holder. Micromovements
and loading of a sample are performed by regular scaner of SPM NT-206.


Micrograph of ball indentor mounted on the cantilever free end |

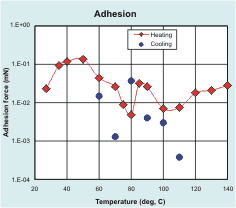
Examples of data obtained with help of microtribometry-adhesiometry function.
|
| |
|
|
| NT-206 |
|
:::
REPLACEABLE SHEAR-FORCE MICROTRIBOMETER UNIT |
|
|

Replaceable shear-force microtribometer
unit.
Overall dimensions (w-d-h): 34x38x20 mm, weight <30 g |
A specialized unit equipped with a tuning fork oscillator for realization of
microtribometry measurements under shear-force mode. Steel ball indentor is set
into tangential motion with following parameters:
- linear velocity: 10-4 …10-1 m/s;
- normal load: 0.1…10 mN;
- Friction force: 0.001…1 mN.
The measurement process is controlled from the SurfaceScan
software.
Should be installed in the measurement head instead of regular holder. Loading
of a sample is performed by regular scaner of SPM NT-206.

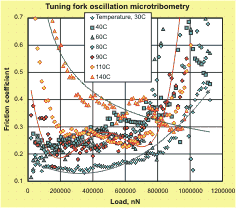
ПExamples of data obtained with help of shear-force microtribometry
function
|

